What is a Kit?
This post covers one of the most important parts of Arctic Fox - kits. Kits are the primary way you tell Arctic Fox what code to generate, and they are built to feel more like natural language.
In this walkthrough, we'll explore:
- What a kit looks like in code
- How to pass options into a kit
- What the code behind a kit looks like
A Kit is a Python Comment
At their core, kits are just Python comments - well, at least the pure text is.
In Python, any line that starts with a '#' is a comment. A kit is simply a special kind of comment that starts with '#>'. That's it!
When you type '#>' in a Python file that has Arctic Fox enabled, the '#>' turns magenta, and a list of available kits appears through autocomplete. This lets you quickly explore and select kits without needing to memorize them all.
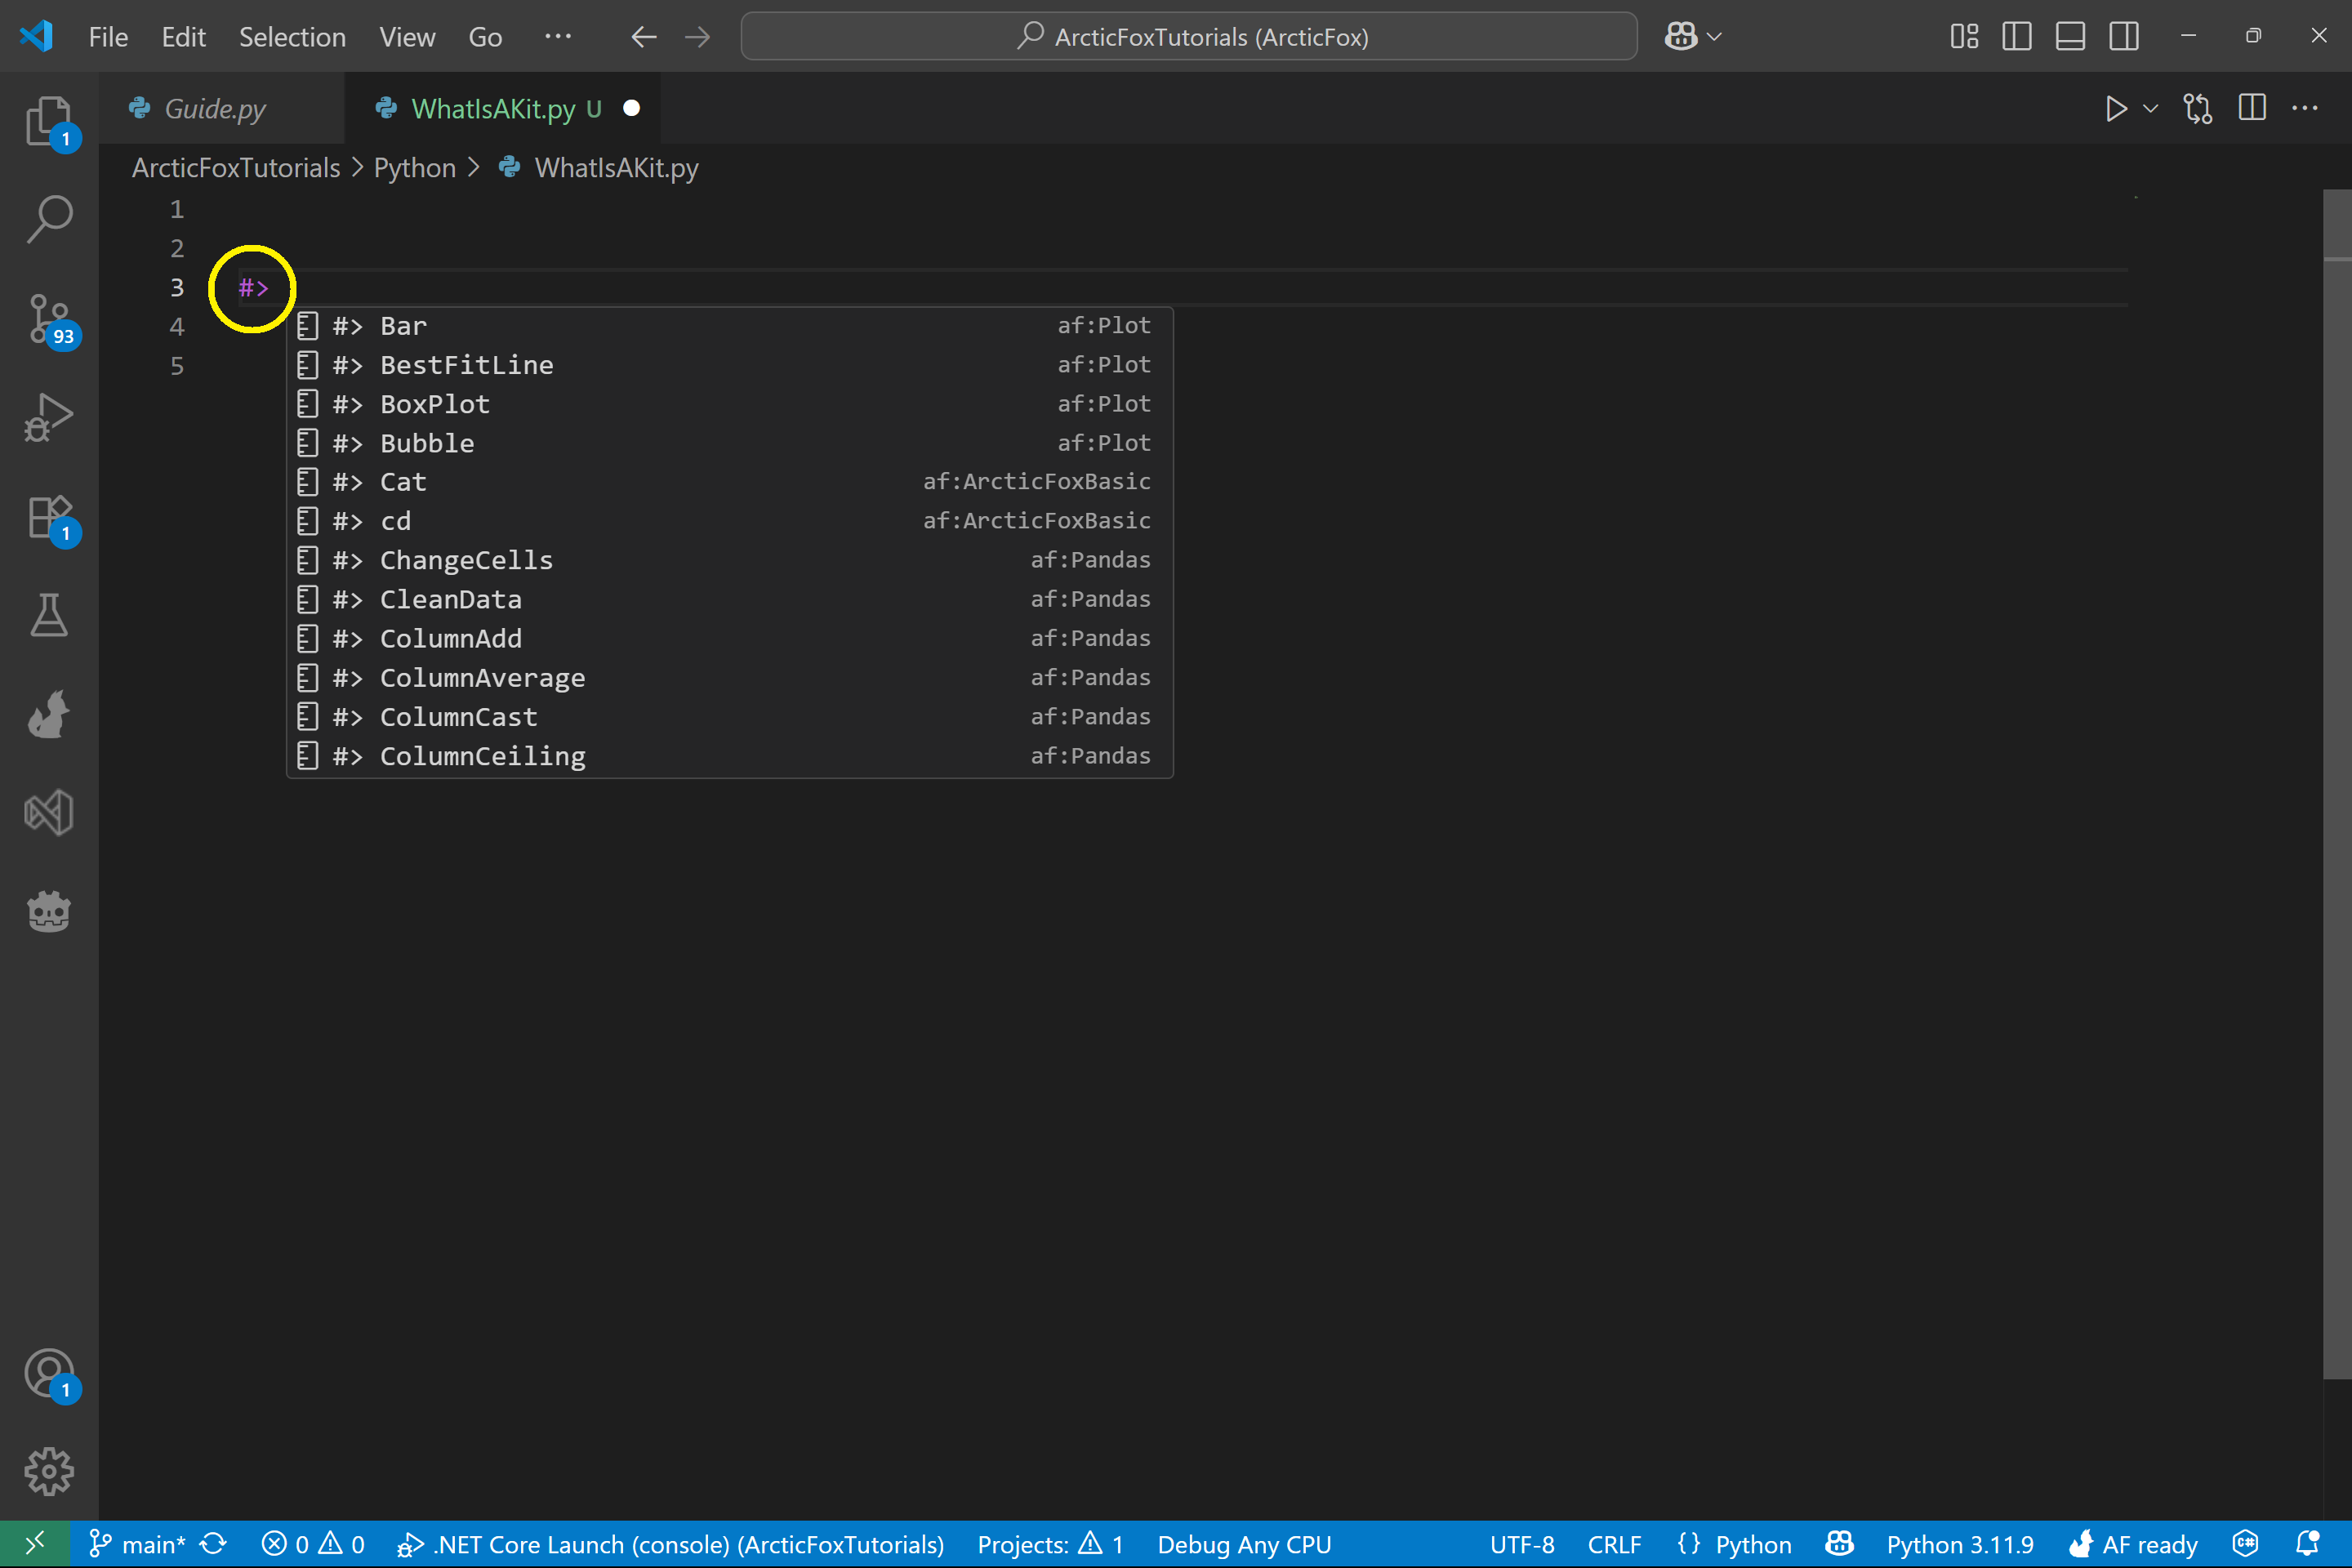
Each kit has a name that identifies what it does. The kit name is the first word that appears after the '#>'.
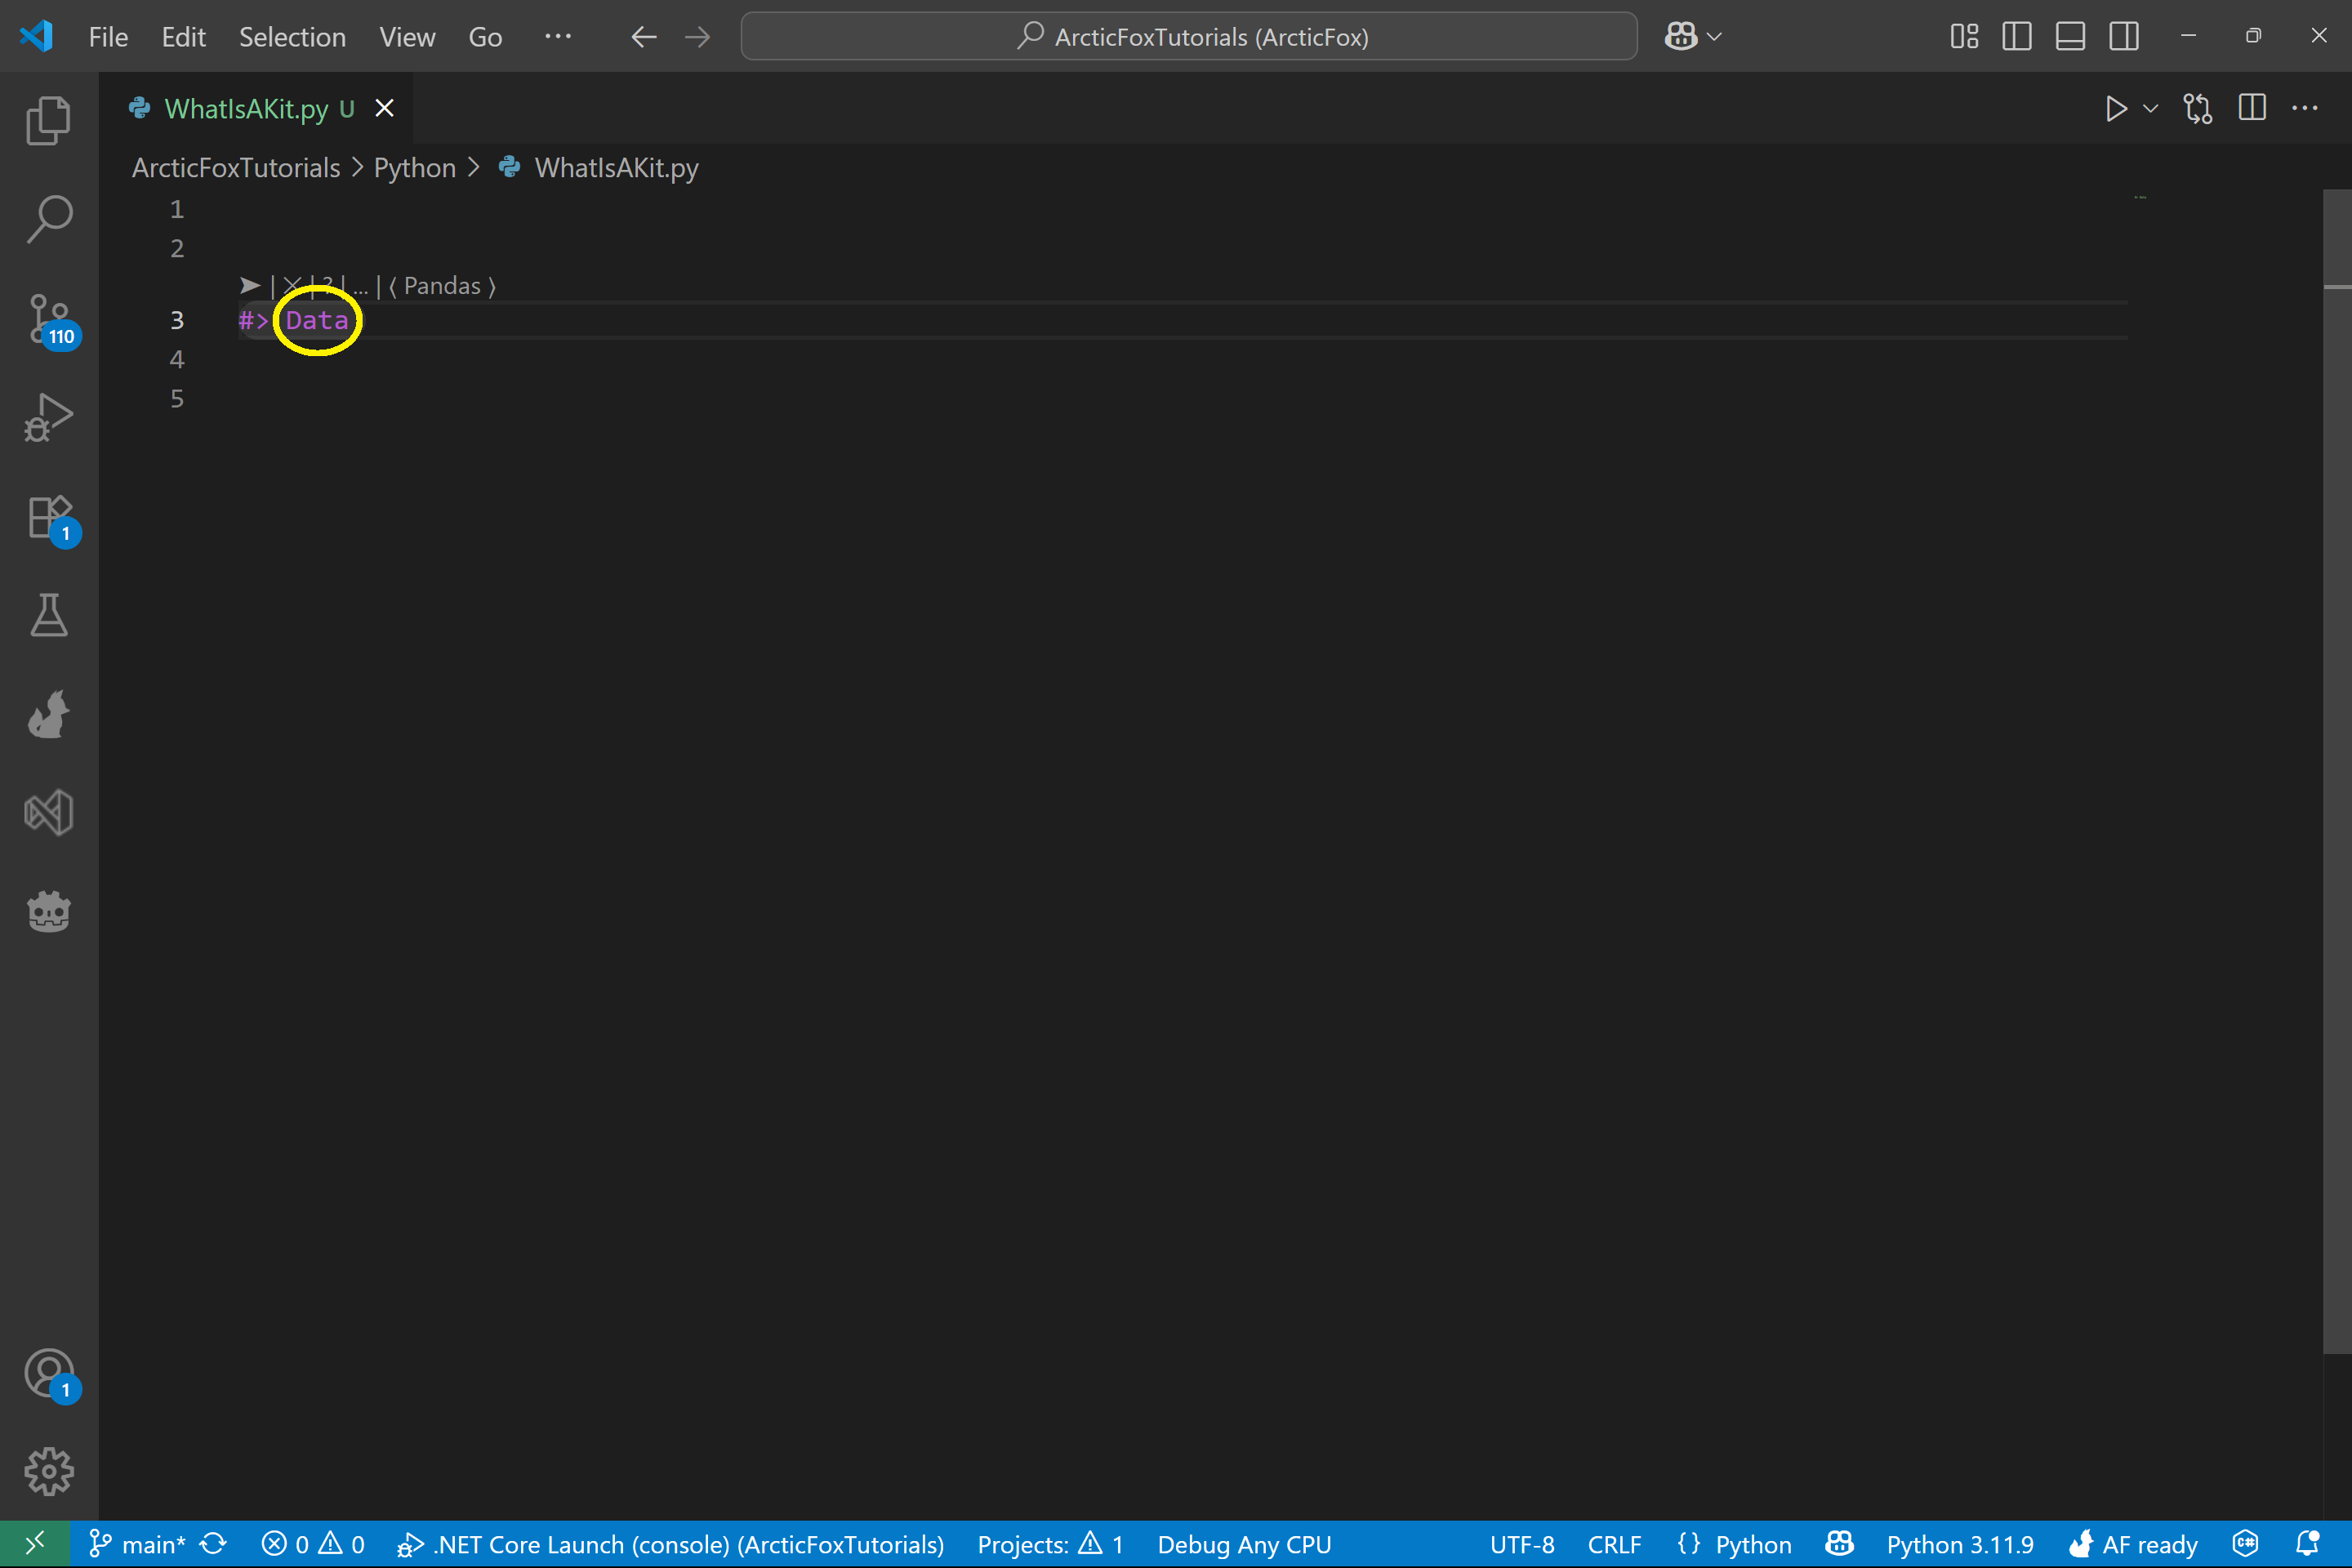
In the image below, we typed '#> Data' to use the Data kit. In this case, the name of the kit to use is Data.
How to Pass In Options
Kits can be customized using options, which work similarly to function arguments. However, in the world of kits, we call them options because of their flexible, user-friendly style.
You can pass options to a kit in three main ways:
Pass Options by Position
Sometimes you only need to pass one or two simple inputs. In this case, kits can accept options by position.
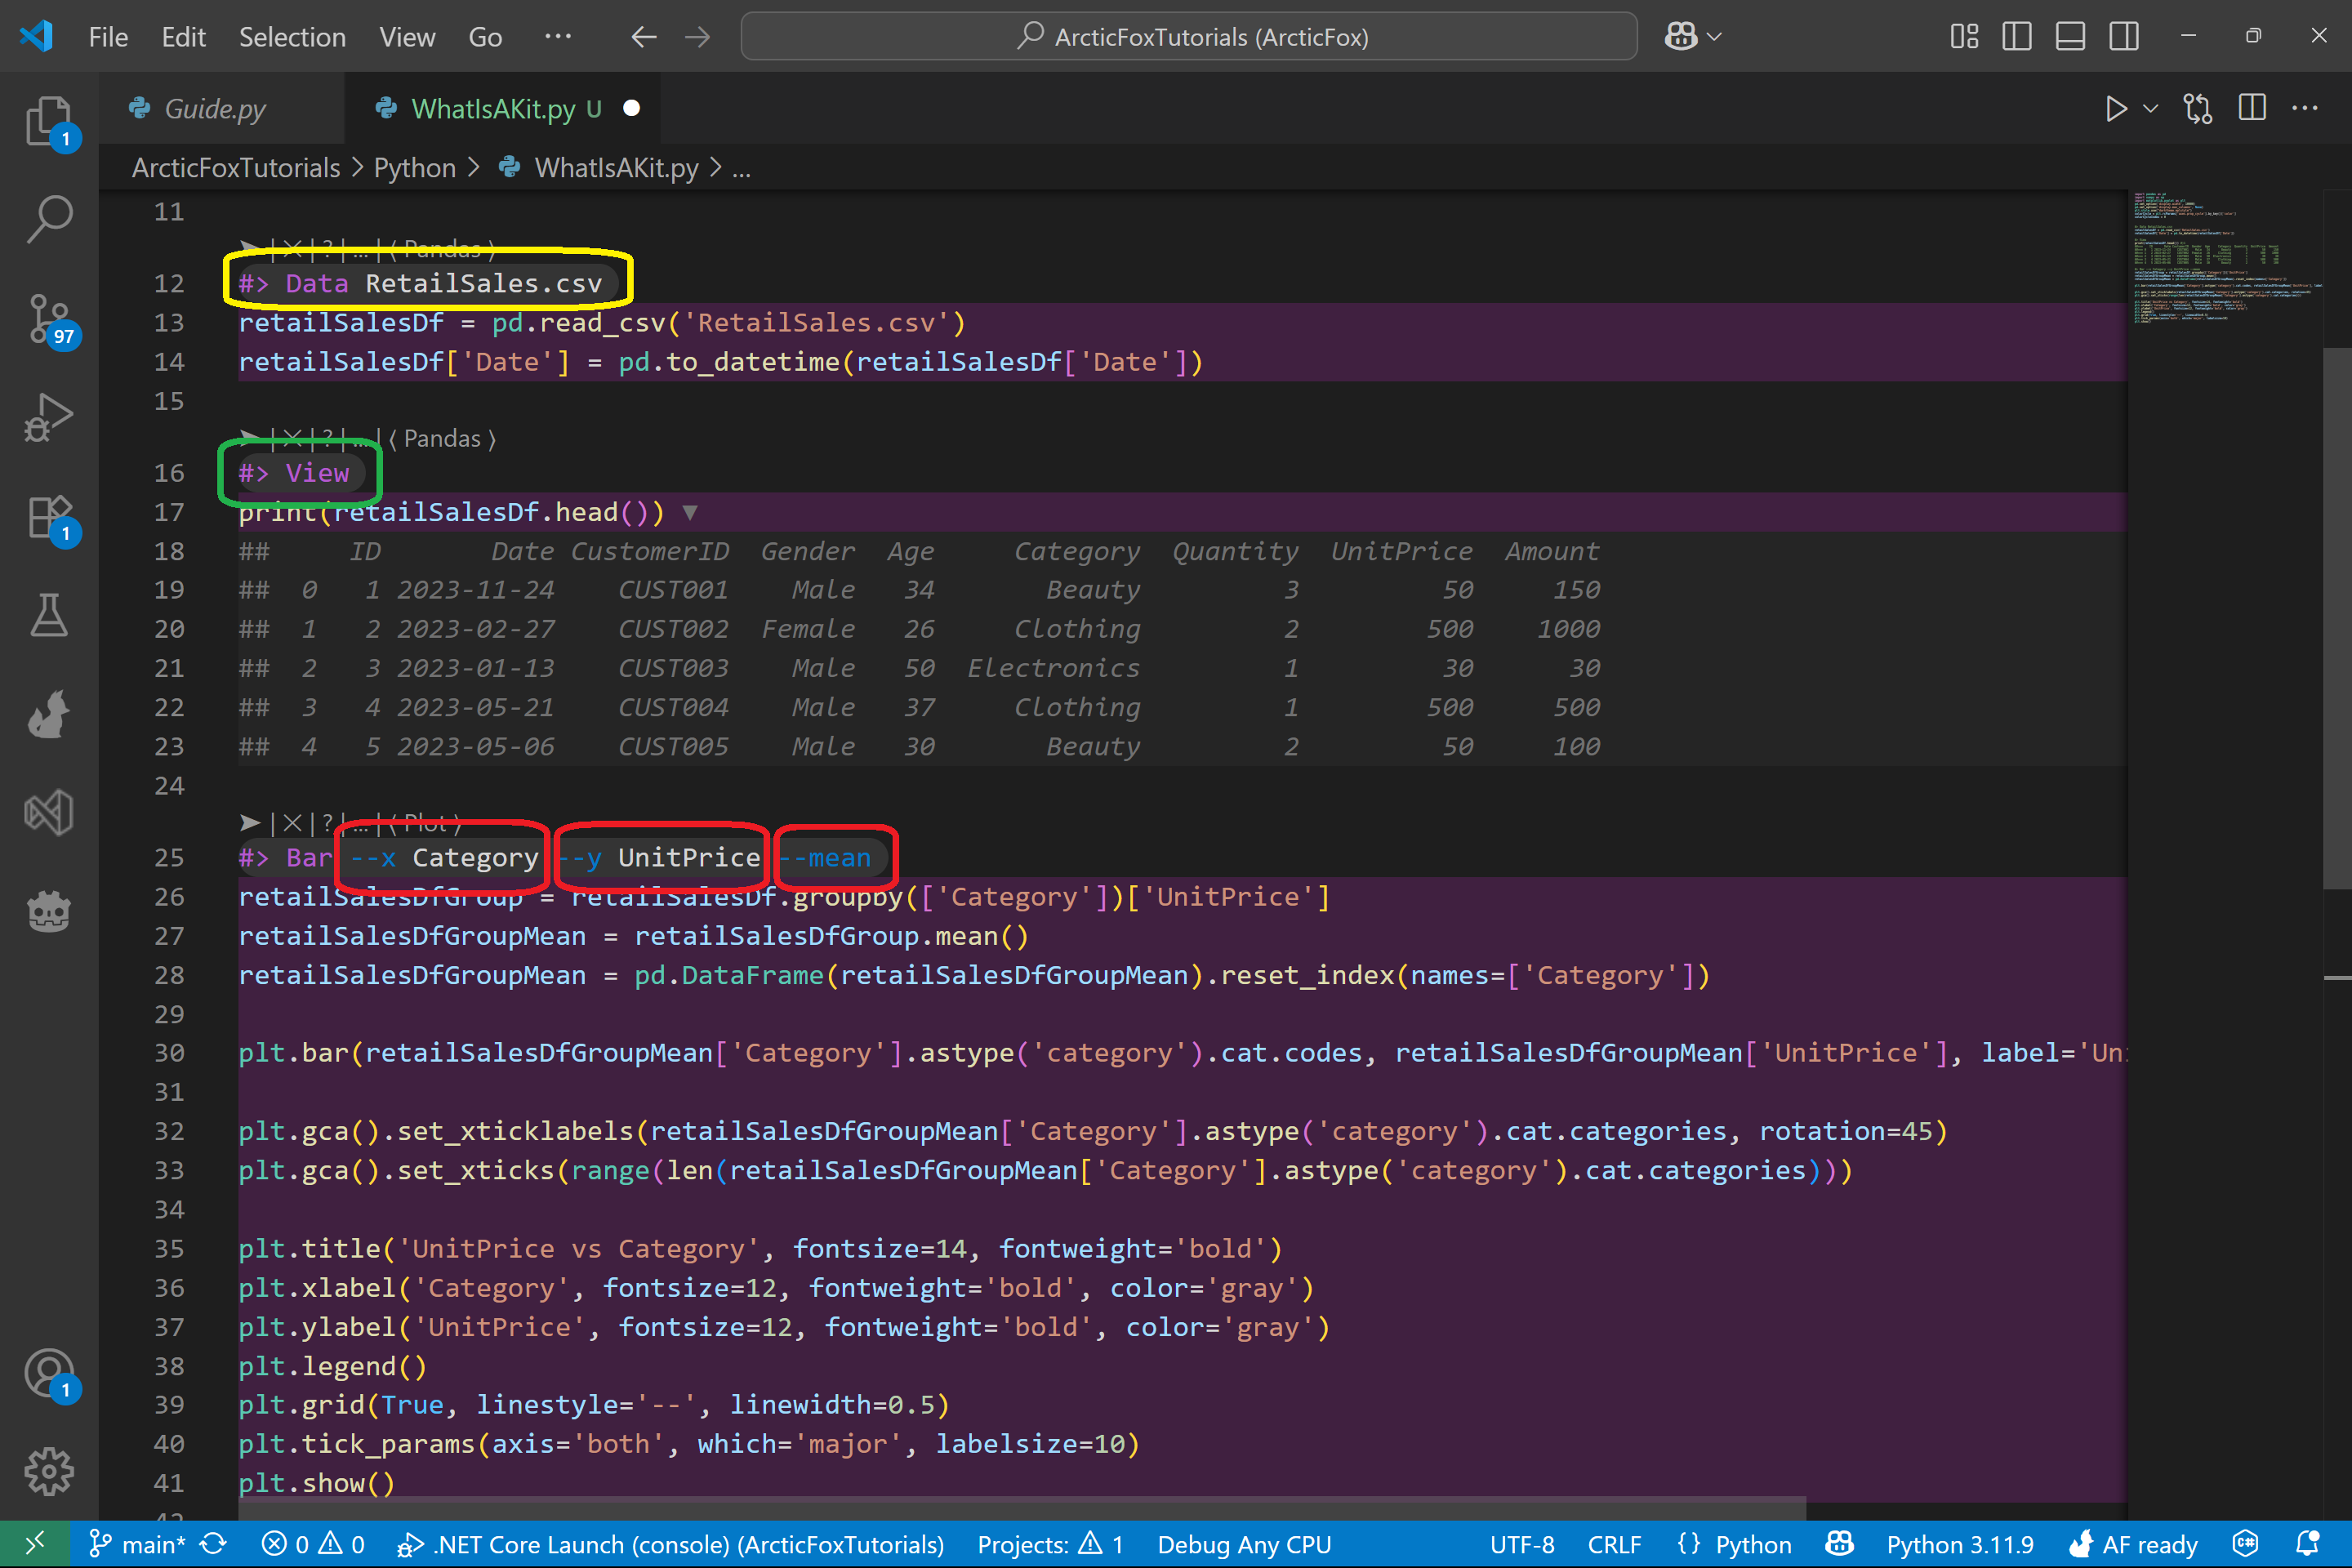
In the example below, the Data kit, circled in yellow, is passed a filename (RetailSales.csv) as its first (and only) option. We don't specify the option name, because Arctic Fox knows that the first argument to Data is a file path.
This makes things quick and clean when the kit's usage is obvious.
Kits Without Options
Not all kits require options!
In the second kit below, View, circled in green, no options are passed in at all. The View kit simply finds the most recent dataframe and shows a preview of it - perfect for quick checks.
While the View kit does support optional customization (like how many rows to show), none are required to get started.
Pass Options by Name
When you want more control, you can pass named options to a kit.
In the third kit below, Bar, whose options are circled in red, we pass in three options:
- --x and --y specify which columns to use from the dataframe
- for these, x and y are option names and Category and UnitPrice are option values
- --mean is a flag - it doesn't require a value and acts like a boolean toggle
This gives you fine-tuned control over how the kit behaves.
Code Behind Kits
Kits aren't magic or AI - they're Python. When you use a kit, Arctic Fox simply finds the matching kit Python file behind the scenes and generates code.
All kits live inside the Workspace Kits folder within your open VS Code folder. You can even create your own kits!
In the example below, we created a kit that prints out the minimum, mean, and maximum of a column.
Here's what's happening:
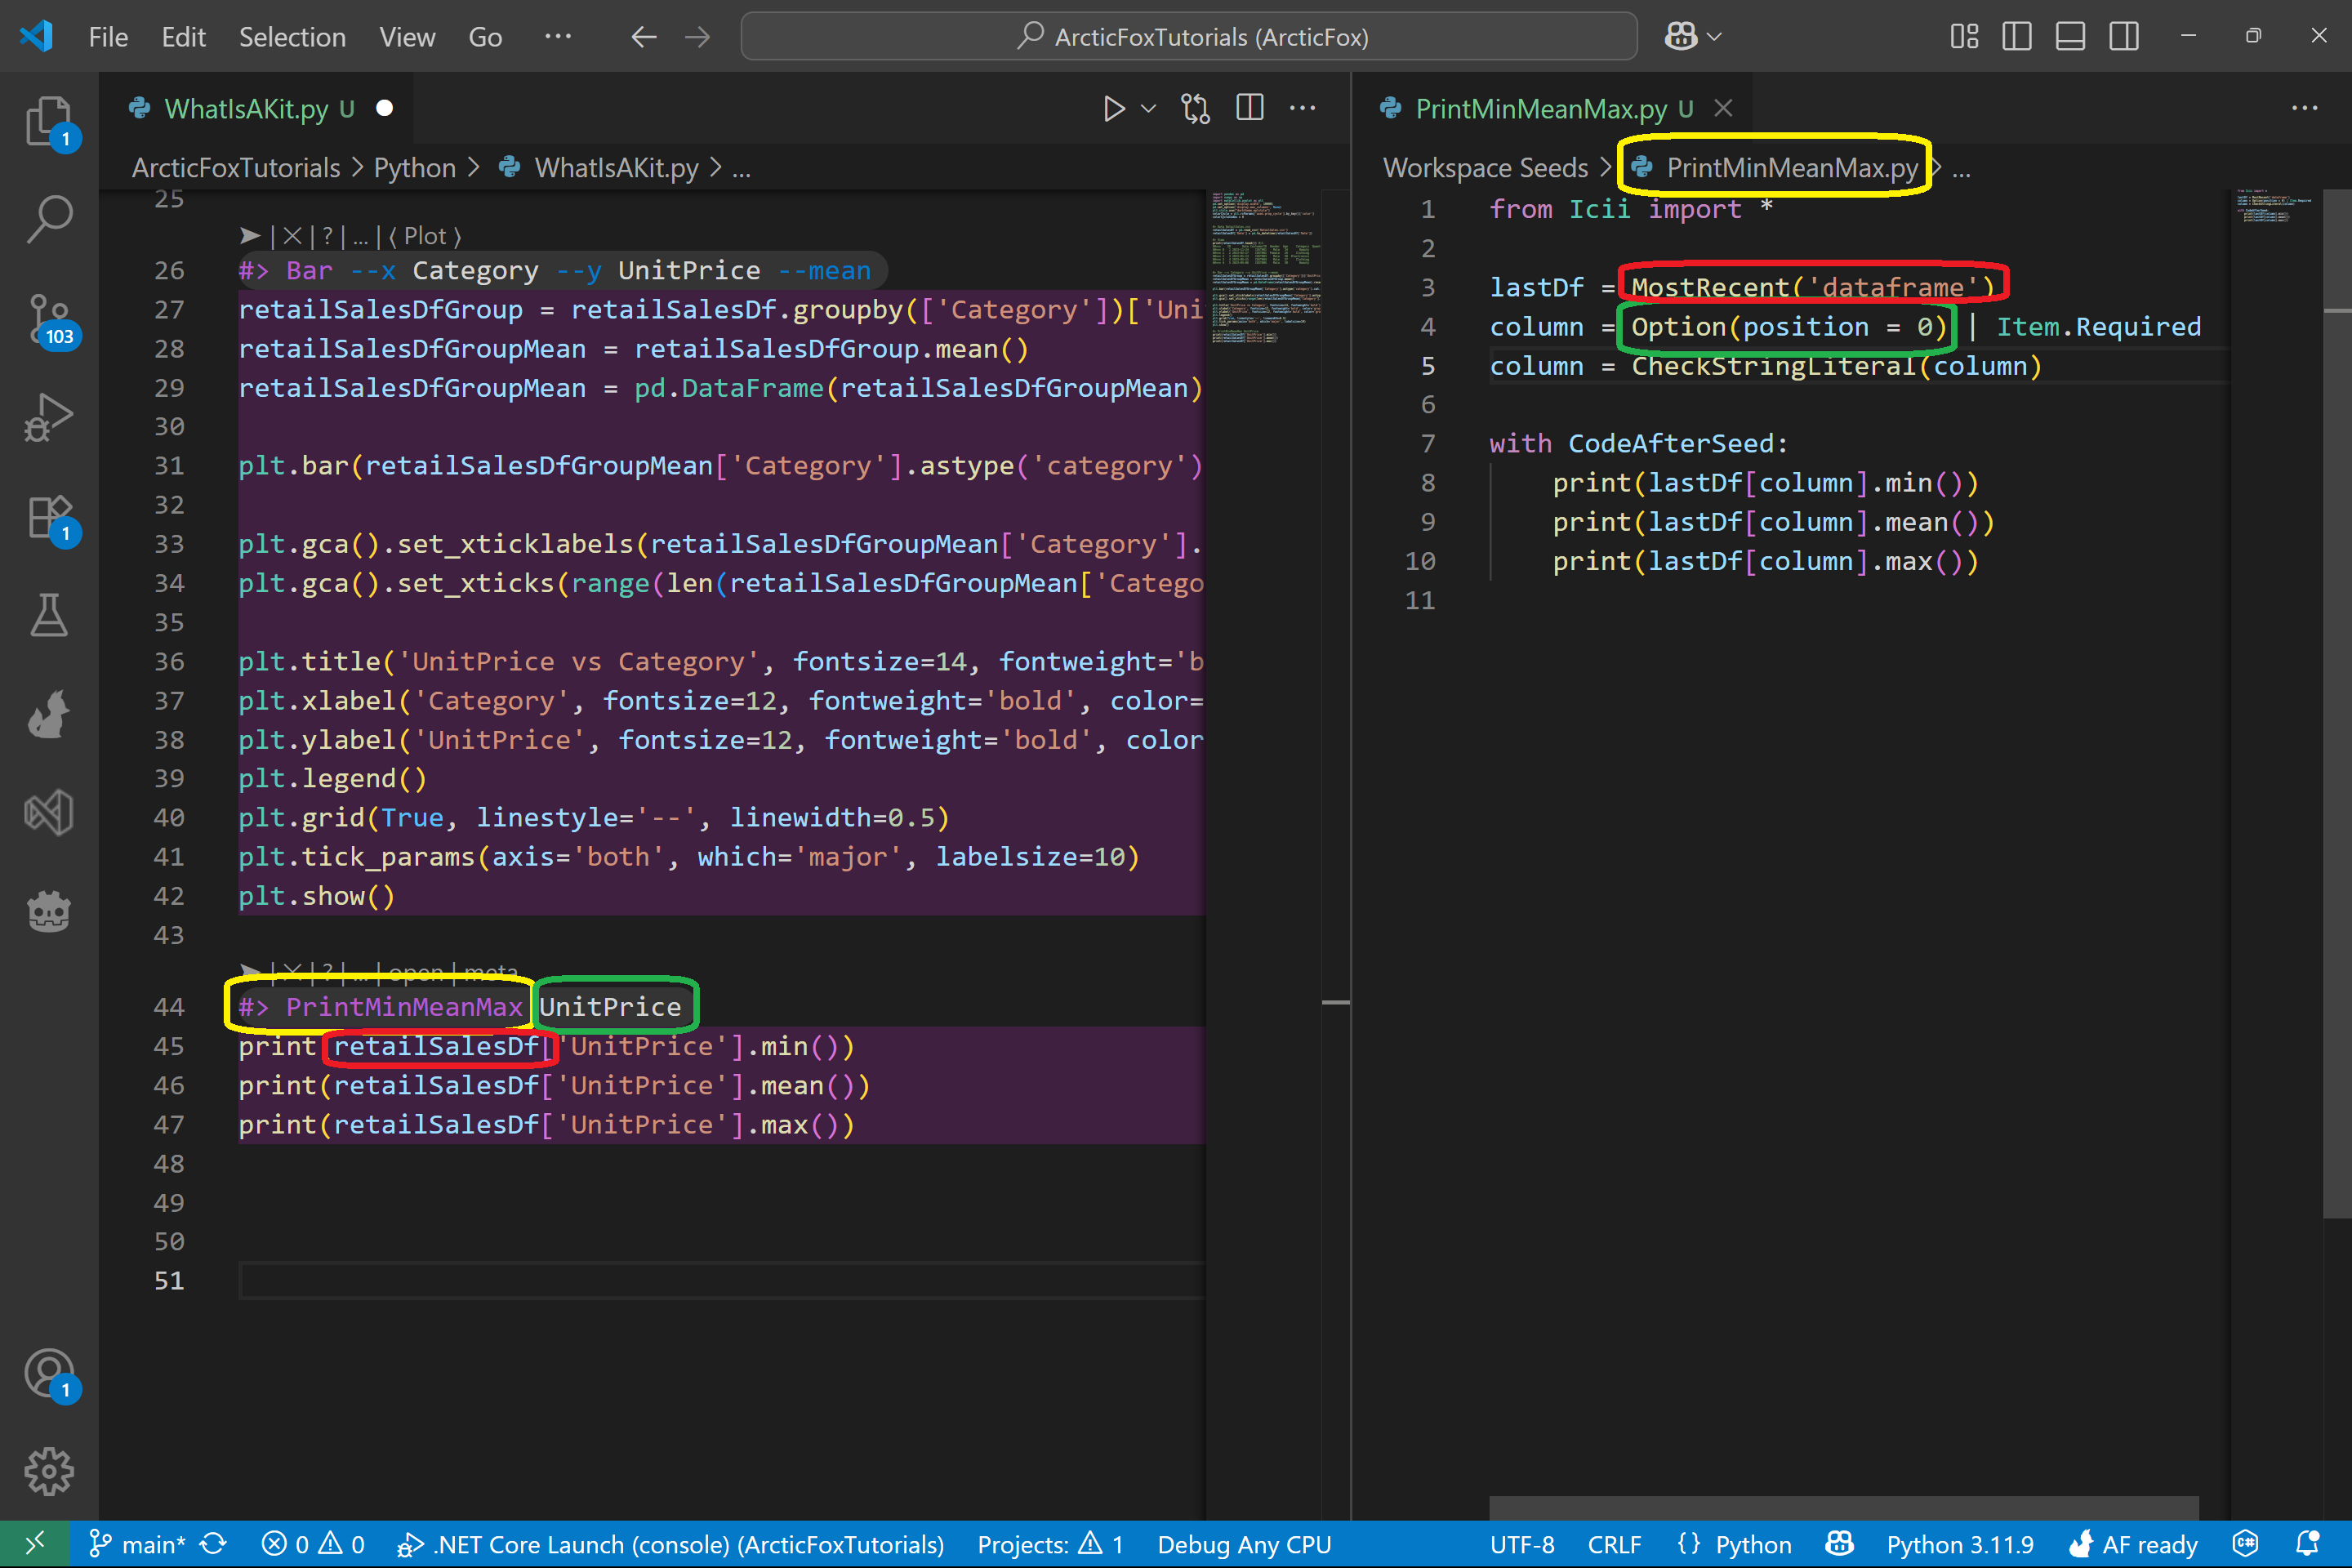
- The kit is invoked in the file with '#> PrintMinMeanMax UnitPrice'
- The name of the kit (PrintMinMeanMax) matches the Python filename (PrintMinMeanMax.py)
- The value UnitPrice is passed in as an option
- The code inside the kit fetches the last-used dataframe and reads the option to compute the stats
We've highlighted these connections in the image below:
- Yellow: The kit Name PrintMinMeanMax matches the file name PrintMinMeanMax.py
- Green: The UnitPrice option and the code retrieving its value
- Red: The dataframe (retailSalesDf) and the code accessing it
Recap
In this post, we covered the fundamentals of kits:
- Kits are just Python comments that begin with '#>'
- Each kit has a name that determines what code it will generate
- You can pass in options by position or by name - or leave them out entirely
- Kits are backed by plain Python code that you can read, edit, and even write yourself!
Thanks for reading!